Make the Web a More Colorful Place!
A guide to using new color spaces & formats with OddContrast
OddBird’s color tool not only checks contrast ratios, but supports the new CSS color formats and spaces.

Learn how to leverage Web Platform Tests to ensure your polyfills are implementing upcoming browser features correctly, including how to generate a comprehensive report of failing/passing tests on each change.
The Web Platform Tests (WPT) are a cross-browser test suite for the web platform stack, including WHATWG, W3C, and other specifications. They help browser vendors gauge their compatibility with the web platform by writing tests that can be run in all browsers. This gives confidence to both browser projects and web developers that they are shipping software that is compatible with other implementations, and that they can rely on the web platform to work across browsers and devices without needing extra layers of abstraction. The WPT repository also provides documentation, tools, and resources for test writing and reviewing.
You can run all tests in your current browser by visiting
wpt.live or by cloning the repository and running the ./wpt serve command. The tests are organized in folders, and visiting any of the HTML
files will run all subtests and display the results. For example, visiting the
test
anchor-name-0002.html
with Chrome 112 results in two passing and two failing tests:
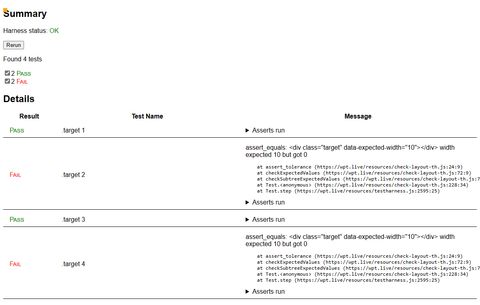
To get a bird’s eye view of the test results for upcoming versions of major browsers, visit wpt.fyi.
The primary users of WPT are browser vendors who want to evaluate development versions of their browser against the test suite. However, polyfill authors can also leverage WPT to run the test suite on stable browsers with their polyfill loaded. This is useful to measure the impact of the polyfill in a quantitative way that doesn’t rely on manual testing.
WPT includes built-in support to run with an arbitrary JavaScript file inserted as part of the server response. The process is explained in the official documentation, but it boils down to these steps:
./wpt serve --inject-script=/path/to/polyfill.js<head>. This should be obvious when inspecting the page source.At this point you should hopefully notice test scores have improved with the help of the injected polyfill. If something goes wrong, WPT should also report tests that are not completing or are failing for some other reason.
When we inject our CSS anchor positioning
polyfill and visit the
anchor-name-0002.html test again, we see that all tests are now passing:
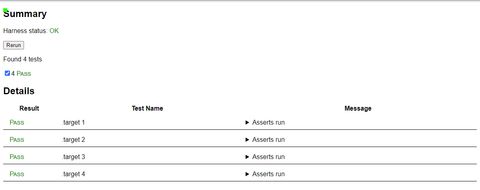
An important part of polyfill development is ensuring the polyfill covers all or most tests for a given feature to maintain compliance with the spec. Furthermore, polyfill authors want to monitor how coverage changes as features are added to the polyfill. Lastly, it’s important to detect changes in test results as the specs evolve and tests are added or modified.
You can do these things manually if you thoroughly visit all tests that apply to your polyfill, but we wanted an automated way to inject the polyfill when running WPT against all browsers, monitor the results for each run, and understand how they change over time.
We have implemented an automated approach that accomplishes just that for our
CSS anchor positioning
polyfill. The WPT results
are gathered and included in an HTML report that visually represents the number
of subtests that are passing each time a commit is pushed to main. This makes
it easy to get the general idea of which tests are passing and which ones
require more work. It also provides links to the test source and the test page
on wpt.live and the local server (assuming you have it
running). The HTML report can be viewed and shared as a standalone file, or
hosted on any service that supports static sites. We use Netlify to host the
report page for the anchor positioning
polyfill.
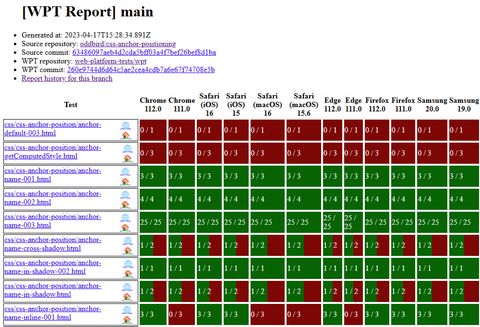
Note: the report includes many failing tests because the polyfill is a work in progress and is actively being worked on.
Another important feature is the automatic generation of reports for pull
requests. This allows the team to quickly compare the report of a branch that
implements a new polyfill feature against the base report from the main
branch. GitHub Actions takes care of creating this PR report and including a
comment
linking to it on all pull requests.
Let’s dive into the steps required to automate the report generation.
Before we start testing, we need to make sure the WPT server is running with the
--inject-script flag. This process needs to be started separately, and kept
running for the duration of the test runs. It’s important to note that WPT
requires Python to run this server, so you will need to have it installed in
your system or CI environment.
Polyfills target specific browser features and are only concerned with specific WPT results. To avoid running the entire WPT suite, we first need a list of programmatically filtered-down tests that are relevant to our polyfill. The final list of tests makes up the rows of the report.
Fortunately, WPT can generate a manifest file that we can easily parse as JSON to apply our custom filter logic.
When testing the polyfill, we want to make sure we cover a wide array of browser versions and engines to reach as many users as possible. For anchor positioning, we are leveraging Browserslist to generate a list of the two most recent versions of Chrome, Firefox, Edge, Safari, and Samsung Internet. These make up the columns of the report, and each test will run against each browser version. By using Browserslist we ensure the test suite is running against new browser versions as they are released.
By using BrowserStack and Selenium, we can spawn instances of all browsers and point them to the relevant test. We recommend using an asynchronous approach to run the browsers because the total number of test runs is the product of all relevant tests and browser versions (rows times columns). For our test suite of 71 tests and 12 browser versions, that results in 852 runs, so the speed boost from running multiple browsers at once is a welcome addition.
Visiting any WPT page in your browser will produce a human-readable report of the subtest results, but WPT also supports programmatic access to these results. Once the browser processes are started we can use this access to gather the results and store them for later review and to generate the report.
In our case we are storing the raw test result data as a JSON file in case we ever want to go back to a previous test run and analyze it further.
Finally, with the test results available we use a LiquidJS template to generate an HTML file with a table cell for each test and browser version combination. For ease of use we also include links to the specific commit that generated the report, for both the polyfill and WPT repositories (in case we are using a forked WPT repo).
We also save timestamped versions of the report to create an historic archive, which is very useful to detect regressions or changes in tests for a given feature or spec.
You can complete all the previous steps manually, but to get the most use out of WPT we recommend including it as part of your CI. Based on the work of the Container Query Polyfill team, the anchor positioning polyfill uses these files to automate the workflow:
.github/workflows/test-wpt.yml:
GitHub Actions workflow definition that holds environment variables and glues
all the pieces together, including building the polyfill and committing the
report to a separate branch that deploys to Netlify.tests/wpt.ts:
The main file called by the GH Actions workflow. Takes care of most things
from gathering the WPT list to generating the report.tests/runner.html:
Acts as the entrypoint for browsers to load tests and packages the results for
storage and reporting.tests/report.liquid:
HTML template for the report. The LiquidJS template language makes it easy to
iterate over and render the result data.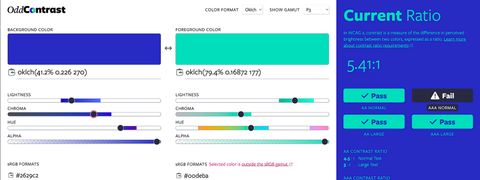
A guide to using new color spaces & formats with OddContrast
OddBird’s color tool not only checks contrast ratios, but supports the new CSS color formats and spaces.

hint popovers, position-area and more
We have been busy updating the Popover and CSS Anchor Positioning Polyfills, but there is still more we can do with your help.
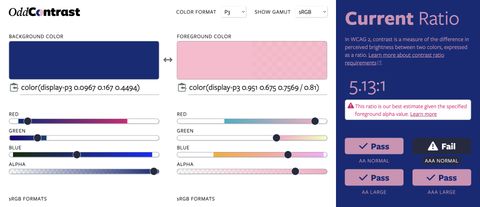
Display color gamut ranges and more
OddContrast, OddBird’s color format converter and contrast checker, gets new features – including the ability to swap background and foreground colors, and display color gamut ranges on the color sliders. Contrast ratios now incorporate foreground color alpha values.